1. ADFS에서 Application Group 생성
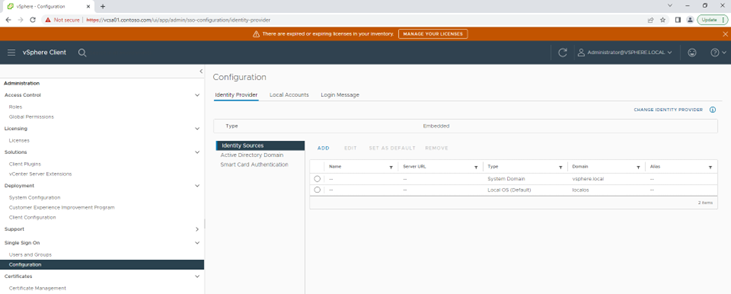
우선, vCenter에서 Redirect URIs를 확인해야 합니다.
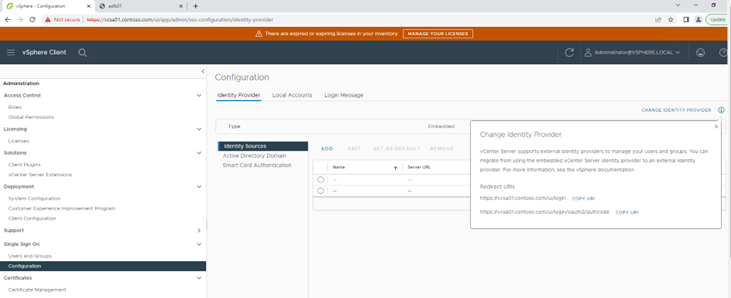
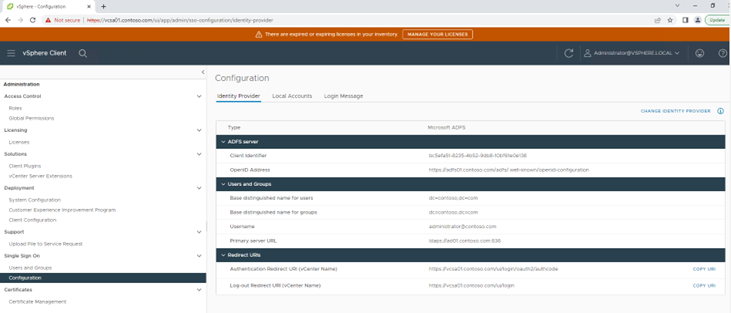
vCenter > Administration > Single Sign On > Configuration > Identity Provider 탭에서 Change Identity Provider 우측에 위치한 "!" 표시를 클릭하면 Redirect URI 정보를 알 수 있습니다.
아래 그림에서는 두 가지 Redirect URI가 확인됩니다.
https://vcsa01.contoso.com/ui/login
https://vcsa01.contoso.com/ui/login/oauth2/authcode
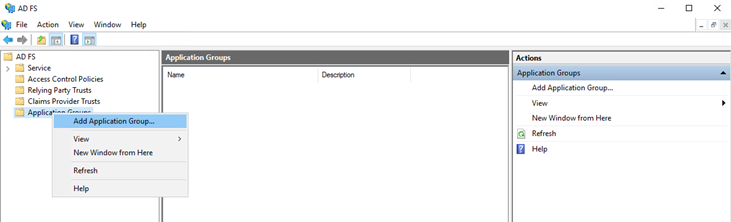
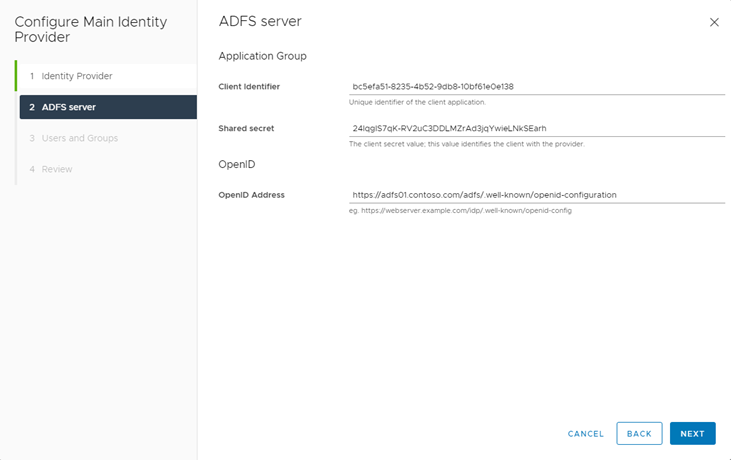
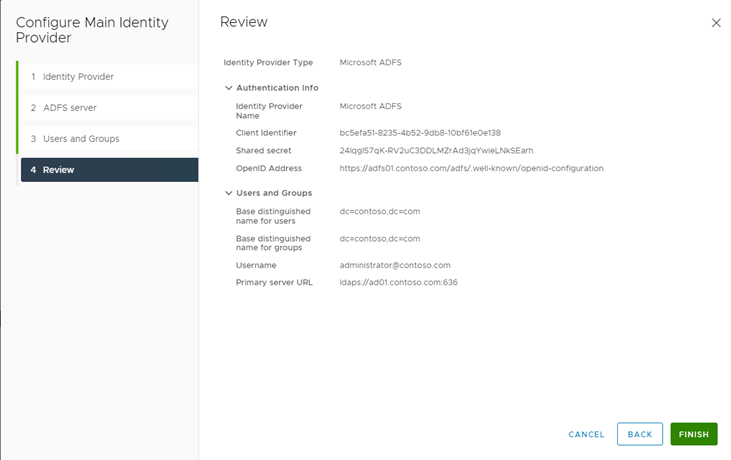
이제 ADFS에서 Client Identifier, Shared Secret, OpenID Address를 생성해야 합니다.
ADFS에서 ADFS 관리도구를 실행(Server Manager > Tools > AD FS Management)하고, Application Group을 추가합니다.
AD FS > Application Groups > Add Application Group
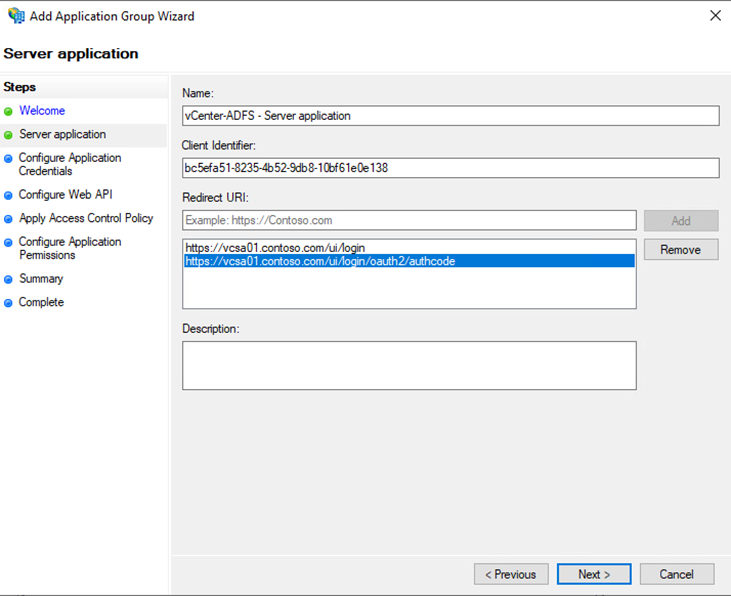
Application Group 이름을 입력하고, Template은 Server application accessing a web API를 선택합니다.

다음 단계에서 vCenter에서 확인했던 Redirect URI 정보를 입력합니다. 이 단계에서 확인 가능한 Client Identifier를 복사해놔야 합니다. 나중에 vCenter에서 작업 시 사용됩니다.
Client Identifier : bc5efa51-8235-4b52-9db8-10bf61e0e138
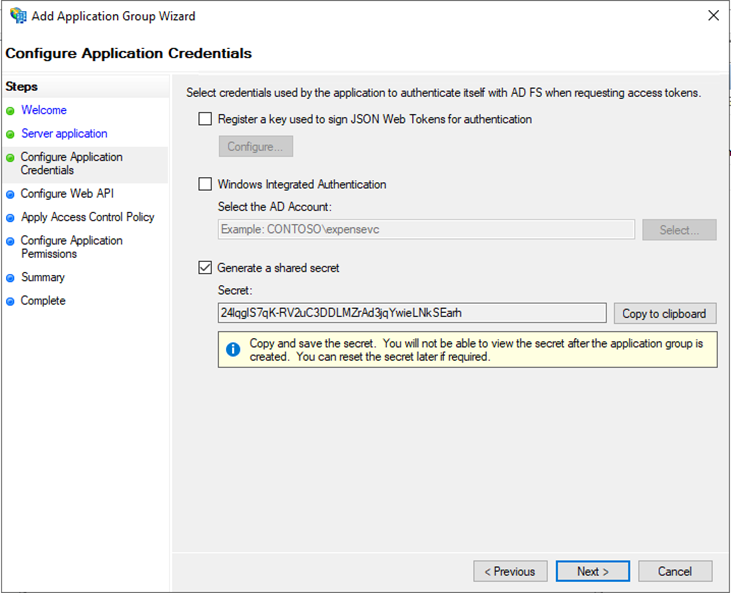
다음 단계에서는 Generate a shared secret을 선택하고, 생성된 Secret 값을 보관합니다.
Secret : 24lqglS7qK-RV2uC3DDLMZrAd3jqYwieLNkSEarh
위에서 획득했던 Client Identifier 값을 추가해줍니다.
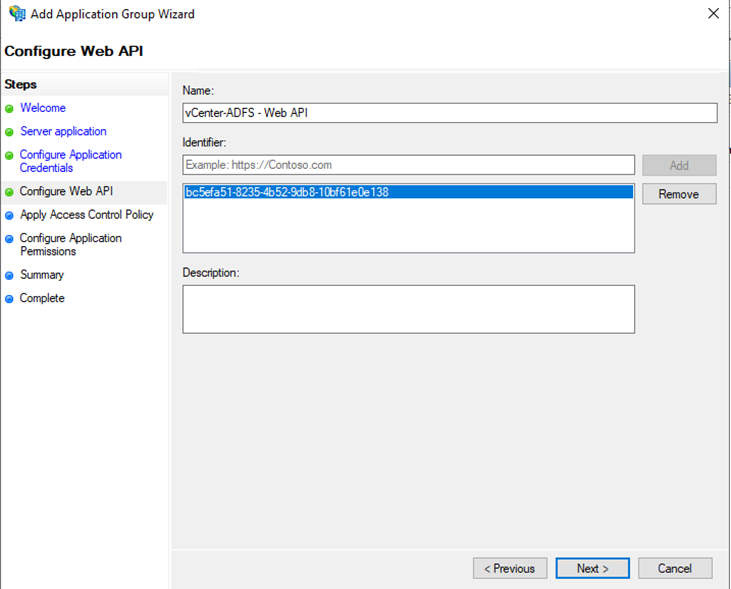
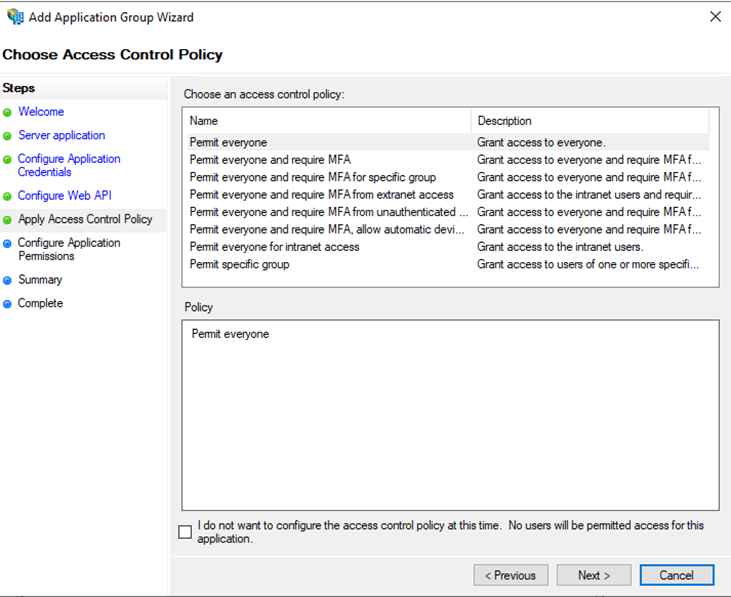
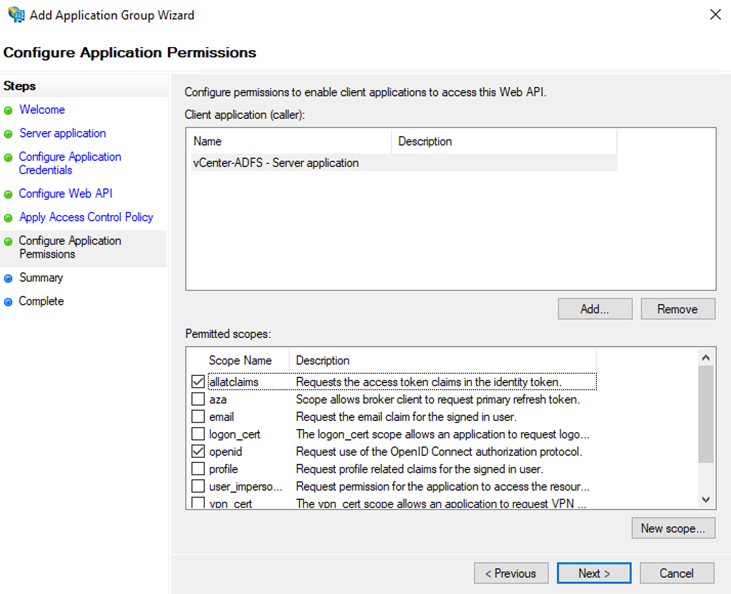
Permitted scope에서는 allatclaims와 openid를 선택합니다.
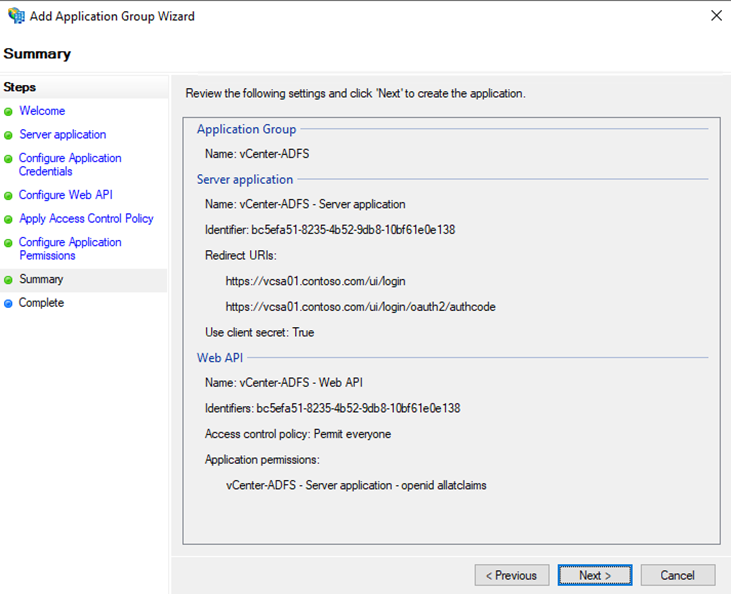
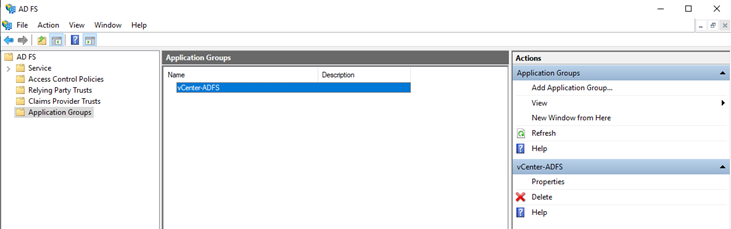
다음과 같이 신규 Application Group이 생성된 것을 확인할 수 있습니다.
OAuth exchange 동안, 올바른 정보가 User Token과 함께 전달되게 하도록 위해서 추가 설정이 필요합니다.
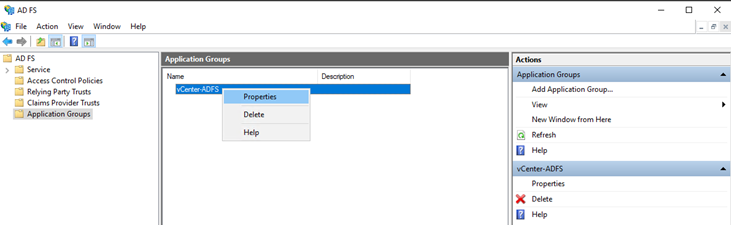
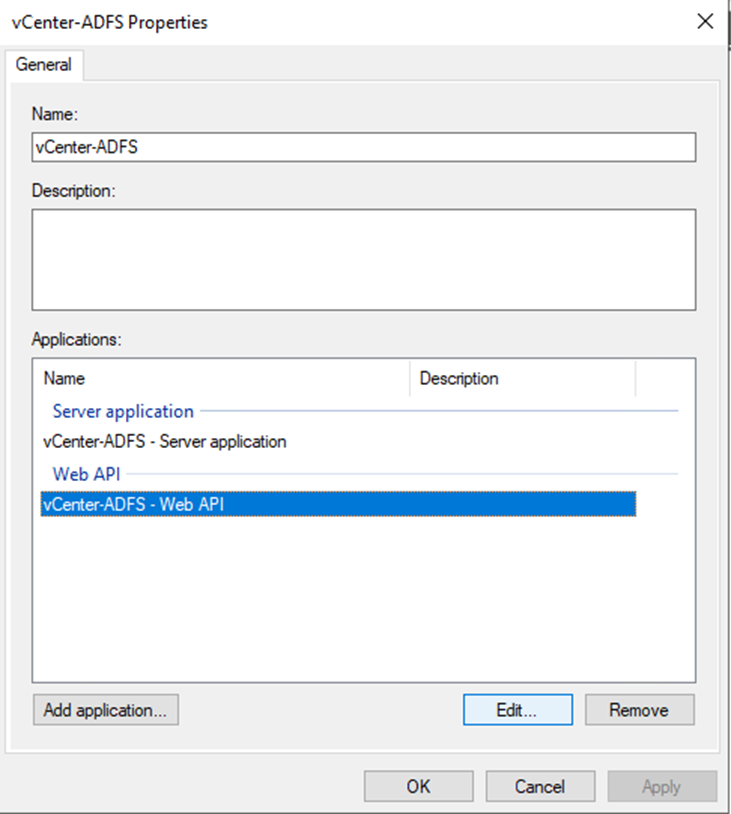
Application Group > Properties
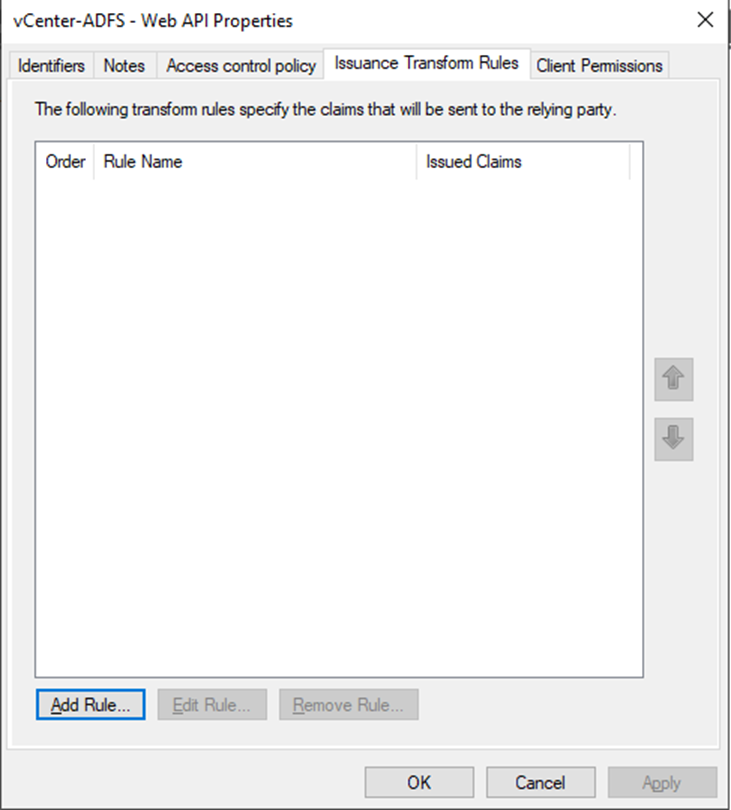
Web API > Edit
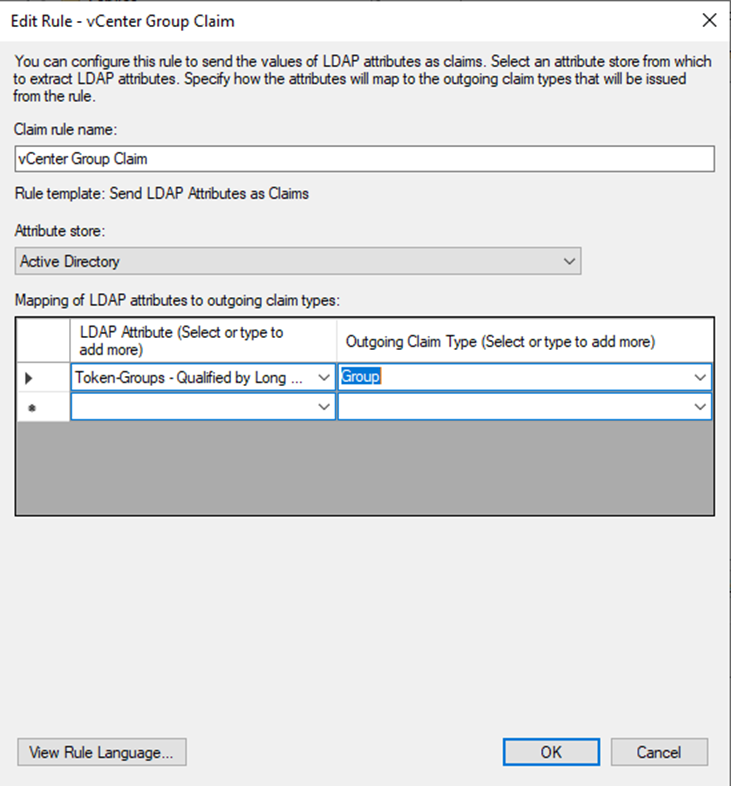
Issuance Transform Rules > Add Rule > Send LDAP Attributes as Claims > vCenter Group Claim
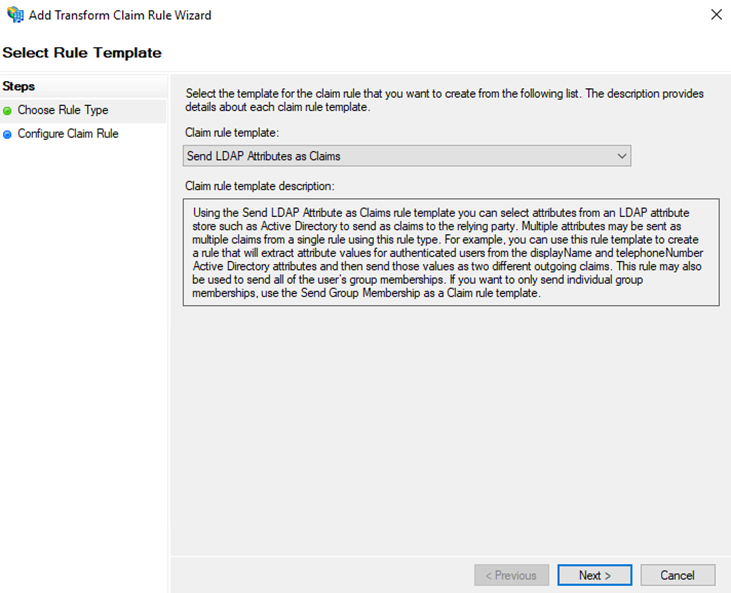
아래 화면처럼 나머지 설청 추가
Issuance Transform Rules > Add Rule > Send LDAP Attributes as Claims > vCenter UPN Claim

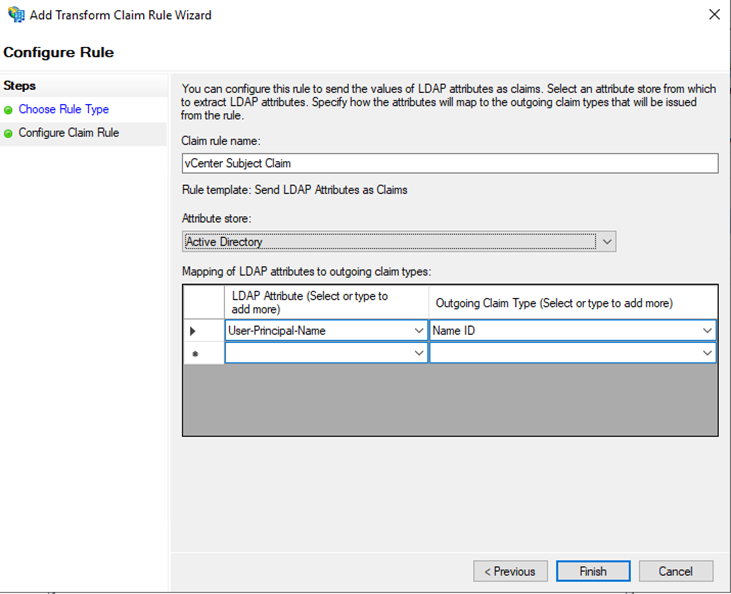
Issuance Transform Rules > Add Rule > Send LDAP Attributes as Claims > vCenter Subject Claim
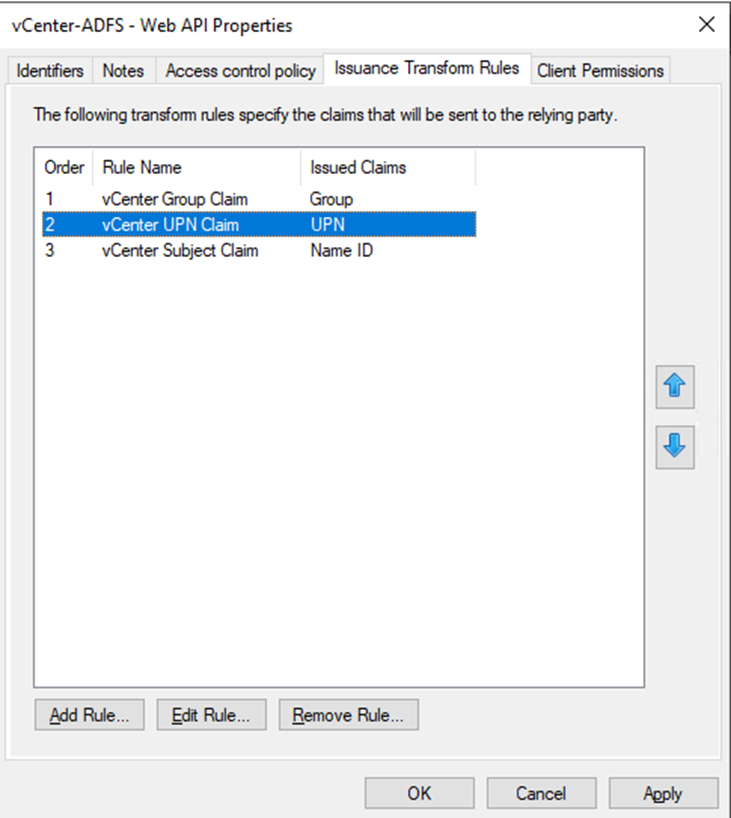
다음과 같이 3개의 Claim Rule이 생성되어야 합니다.
ADFS 서버에서 openid 관련 endpoint 주소를 획득합니다.
Powershell을 관리자 권한으로 실행한 후 GET-adfsendpoint | select FullUrl 명령을 실행한 결과에서 URL에 openid-configuration 값이 들어간 주소를 확인합니다.
본 예제에서는 다음과 같습니다.
https://adfs01.contoso.com/adfs/.well-known/openid-configuration
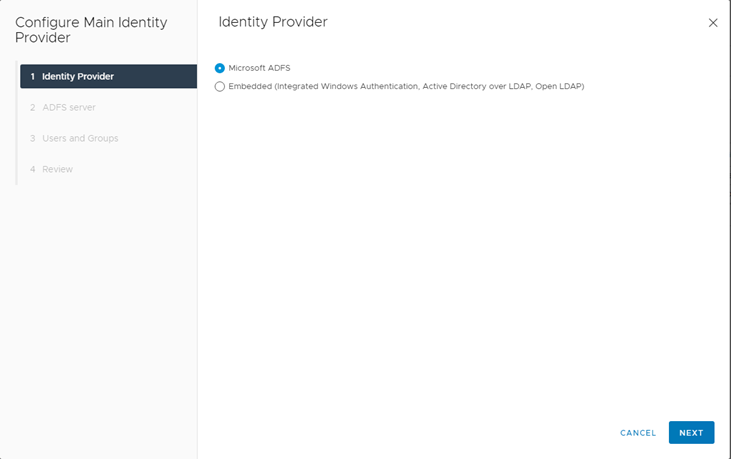
2. vCenter에서 Identity Provider 설정
이제 vCenter로 돌아와서 Identity Provider 설정 작업을 진행합니다.
vCenter > Administration > Single Sign On > Configuration 에서 Change Identity Provider 메뉴를 선택합니다.
Identity Provider로 Microsoft ADFS 를 선택합니다.
이전 단계에서 확인했던 Client Identifier, Shared secret, OpenID Address 값을 입력합니다.
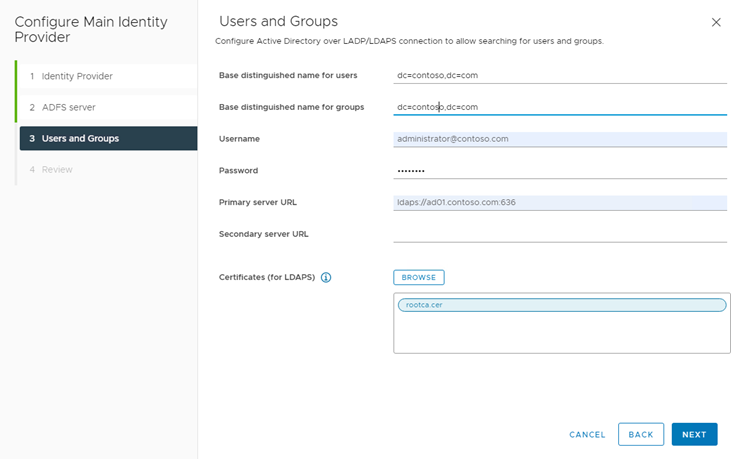
Users and Groups 단계에서는 아래 화면과 같이 입력합니다.
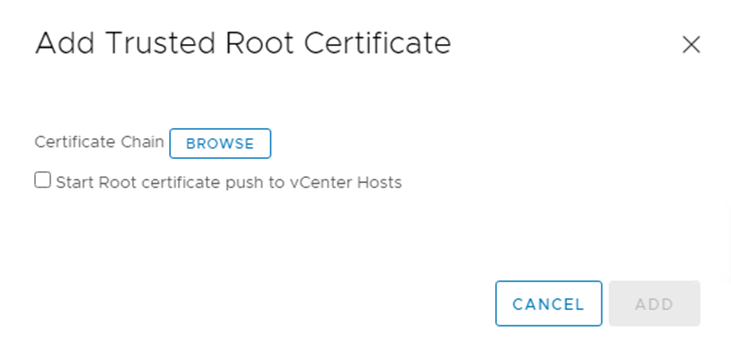
인증서의 경우에는 Root CA 인증서를 업로드 해주셔야 합니다. Root CA 인증서는 export 하실 때, base-64로 하셔야 합니다.
정상적으로 작업이 진행되면, 다음 화면과 같이 ADFS 정보가 추가됩니다.
정상적으로 작업이 안되는 경우, vCenter에서 Root CA 인증서를 수동으로 추가해 볼 수 있습니다.
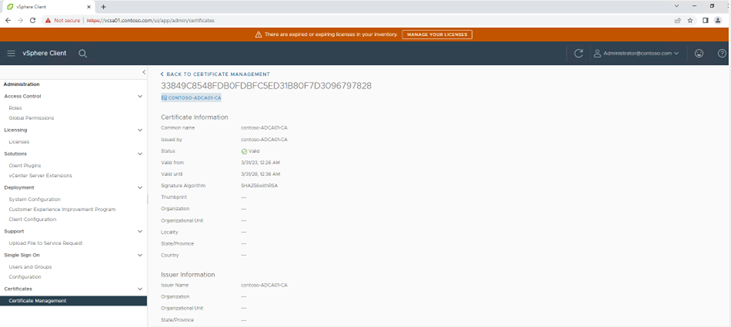
vCenter > Administration > Certificates > Certificate Management
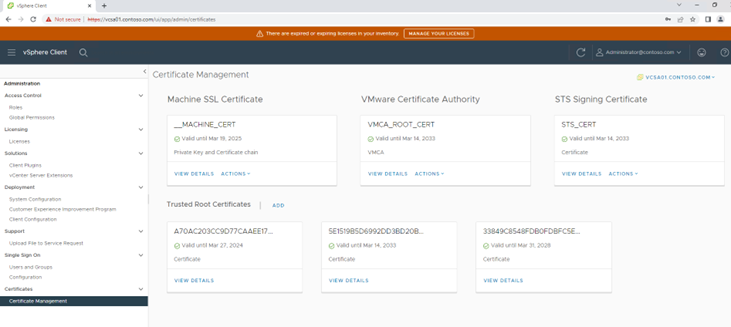
정상적으로 인증서가 추가되면 추가된 인증서를 확인할 수 있습니다.
3. 접속 테스트
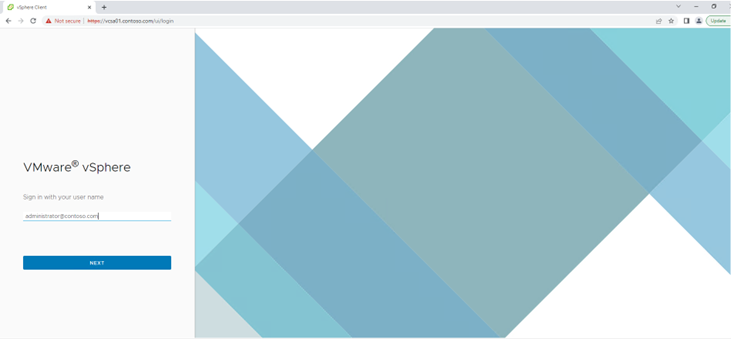
vCenter UI에 다시 접속하면 기존과 다르게 로그인 화면이 다음과 같이 표시됩니다.
여기서 기존에 사용하던 administrator@vsphere.local 계정 대신에, Active Directory Domain 계정인 administrator@contoso.com 을 입력합니다.
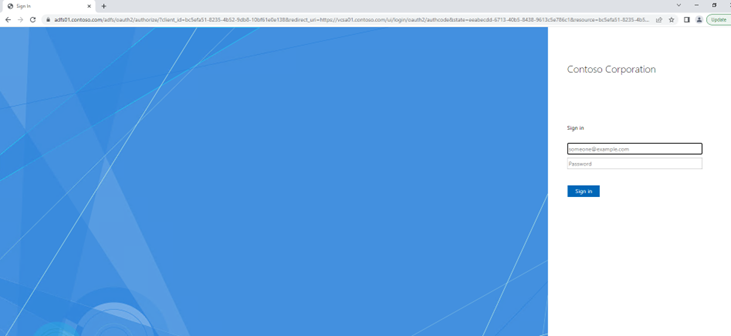
다음 화면과 같이 ADFS 로그인 페이지로 Redirect 됩니다.
여기서 administrator@contoso.com 계정과 암호를 입력합니다.
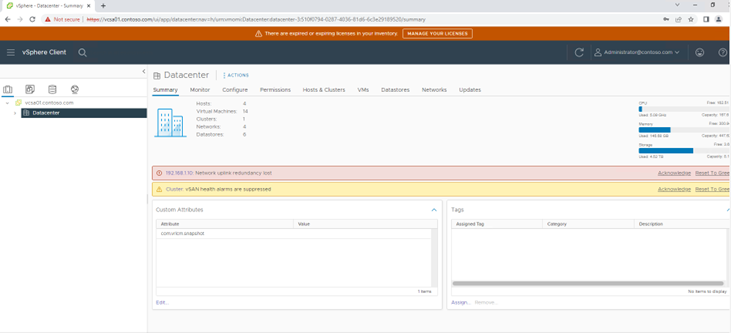
처음에는 사전에 권한을 부여하지 않아, 오류가 날 수 있으나 vCenter에서 administrator@contoso.com 계정에 대해 권한을 부여하고 나면 정상적으로 로그인 가능합니다.
정상적으로 Active Directory Domain 계정인 administrator@contoso.com 계정으로 vCenter에 로그인한 것을 확인하실 수 있습니다.
'Security' 카테고리의 다른 글
| TPM 구성 테스트 (0) | 2023.07.18 |
|---|---|
| TPM Overview (0) | 2023.07.18 |
| Unable to access to web client due to discrepancy between config store database and configuration xml file (0) | 2023.05.05 |
| Configure vCenter Server Identity Provider Federation for AD FS (0) | 2023.04.23 |
| Active Directory - Kerberos (0) | 2022.09.12 |

